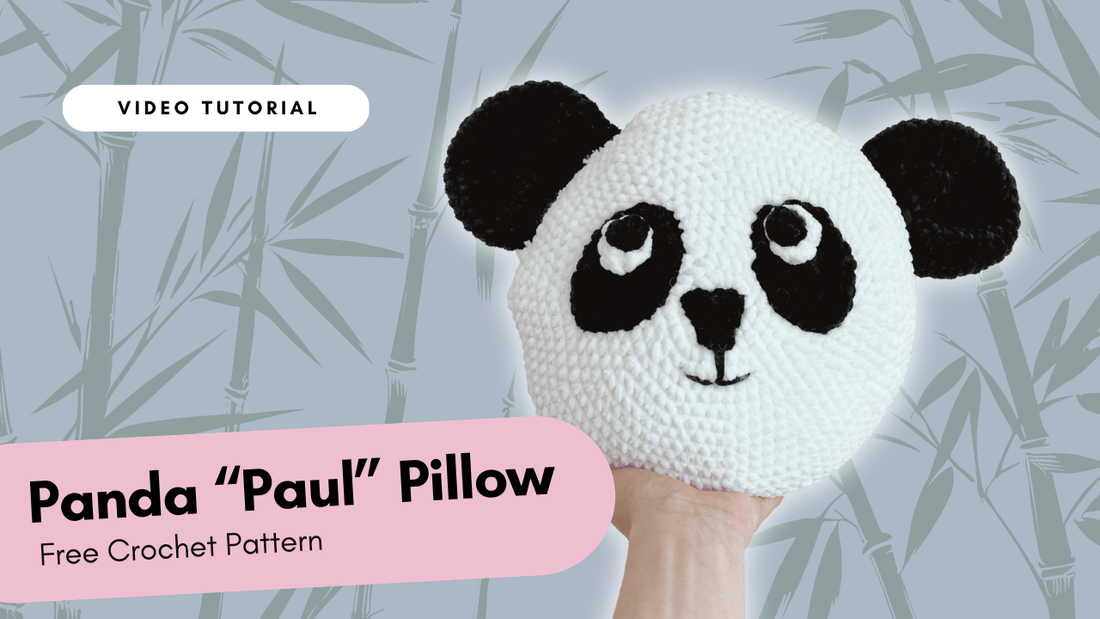
Panda Home Decor Pillow
Looking for a touch of whimsy and charm for your living space? Look no further than Paul Panda, the adorable crochet pillow pattern that's perfect for beginners and experienced crocheters alike!
This free pattern offers clear instructions and helpful tips to guide you in creating a cuddly panda pal that doubles as a plush accent pillow (crochet panda pillow pattern free, free amigurumi panda pattern).
Paul Panda is more than just a cute face, though! Made with soft, huggable yarn, this project is perfect for adding a playful touch to your couch, armchair, or bed. The best part?
This pattern utilizes techniques ideal for beginners, making it a great way to hone your crochet skills while creating a delightful home decor piece (crochet for beginners, easy crochet pillow pattern).
So, grab your yarn and hook, and get ready to bring Paul Panda to life!
Size: Diameter about 29 cm (without ears)

How To Get Ready
Crochet Glossary
- sc: single crochet stitch
- mr: magic ring
- sl st: slip stitch
- ch: chain stitch
- st: stitch
- inc: increase
- dec: decrease
- fo: fasten off
Materials You Need
Yarn
Chenille yarn or any other yarn with yarn weight 5 bulky. Colors:
- Main color: white
- Ears, eyes and nose: black
- Embroidered Mouth: 8/4 cotton yarn | yarn size 2.5mm - 3.5mm | Color: black
Yarn examples for chenille 5 bulky yarn:
- Go Handmade Happy Chunky fine
- Himalaya Dolphin Baby
- Hobbii Honey Bunny
- Hobbii Baby Snuggle Solid
- YarnArt Dolce
- Katia Bambi
- Schachmayr Luxury Velvet
Accessories
- Crochet hook: 5 mm*
- Polyester toy stuffing*
-
Stitch marker*
- Tapestry needle*
- Scissors*
-
Long pins*
*Affiliate Link goes to Amazon US
Note: If you'd like to support my work in creating more free patterns, and you're in need of new crochet supplies, consider shopping through my affiliate links. Every purchase helps me keep designing free patterns and sharing with you! 💕
Pattern Instruction
Note: I used the x-stitch method
Ears
Let’s start with the ears! In this section, we’ll crochet the adorable panda ears that will give your pillow its cute, signature look.
Make 2x. Do not stuff the ears.
Black color
R1: 6 sc in mr [6]
R2: 6 inc [12]
R3: (1 sc, 1 inc) x 6 [18]
R4: (2 sc, 1 inc) x6 [24]
R5: (3 sc, 1 inc) x6 [30]
R6: (4 sc, 1 inc) x6 [36]
R7-10: 36 sc [36] 4 rounds
R11: (4 sc, 1 dec) x6 [30]
R12: (3 sc, 1 dec) x6 [24]
Fold ear and crochet opposite stitches together with 12 sc. Cut yarn and secure
Pillow Body
Note: To create a perfect shaped flat circle, I use the Offset Increase method.
Back side
Next, we’ll move on to the back side of the pillow. Here, we’ll crochet the smooth, cozy back panel that will complete your panda pillow’s shape.
White color
R1: 6 sc in mr [6]
R2: 6 inc [12]
R3: (1 sc, 1 inc) x6 [18]
R4: 1 sc, 1 inc, (2 sc, 1 inc) x5, 1 sc [24]
R5: (3 sc, 1 inc) x6 [30]
R6: 2 sc, 1 inc, (4 sc, 1 inc) x5, 2 sc [36]
R7: (5 sc, 1 inc) x6, [42]
R8: 3 sc, 1 inc, (6 sc, 1 inc) x5, 3 sc [48]
R9: (7 sc, 1 inc) x6 [54]
R10: 4 sc, 1 inc (8 sc, 1 inc) x5, 4 sc [60]
R11: (9 sc, 1 inc) x6 [66]
R12: 5 sc, 1 inc (10 sc, 1 inc) x5, 5 sc [72]
R13: (11 sc, 1 inc) x6 [78]
R14: 6 sc, 1 inc (12 sc, 1 inc) x5, 6 sc [84]
R15: (13 sc, 1 inc) x6 [90]
R16: 7 sc, 1 inc (14 sc, 1 inc) x5, 7 sc [96]
R17: (15 sc, 1 inc) x6 [102]
R18: 8 sc, 1 inc (16 sc, 1 inc) x5, 8 sc [102]
R19: (17 sc, 1 inc) x6 [114]
R20: 9 sc, 1 inc (18 sc, 1 inc) x5, 9 sc [120]
R21: 120 sc [120]
Fasten off: Finish with a sl st. Cut the yarn and sew. Now crochet the front side.

Front side
Now, let’s crochet the front side of the pillow body. This is where your panda's cute face will come to life, so get ready to add those charming details.
White color
R1: 6 sc in mr [6]
R2: 6 inc [12]
R3: (1 sc, 1 inc) x6 [18]
R4: 1 sc, 1 inc, (2 sc, 1 inc) x5, 1 sc [24]
R5: (3 sc, 1 inc) x6 [30]
R6: 2 sc, 1 inc, (4 sc, 1 inc) x5, 2 sc [36]
R7: (5 sc, 1 inc) x6, [42]
R8: 3 sc, 1 inc, (6 sc, 1 inc) x5, 3 sc [48]
R9: (7 sc, 1 inc) x6 [54]
R10: 4 sc, 1 inc (8 sc, 1 inc) x5, 4 sc [60]
R11: (9 sc, 1 inc) x6 [66]
R12: 5 sc, 1 inc (10 sc, 1 inc) x5, 5 sc [72]
R13: (11 sc, 1 inc) x6 [78]
R14: 6 sc, 1 inc (12 sc, 1 inc) x5, 6 sc [84]
R15: (13 sc, 1 inc) x6 [90]
R16: 7 sc, 1 inc (14 sc, 1 inc) x5, 7 sc [96]
R17: (15 sc, 1 inc) x6 [102]
R18: 8 sc, 1 inc (16 sc, 1 inc) x5, 8 sc [102]
R19: (17 sc, 1 inc) x6 [114]
R20: 9 sc, 1 inc (18 sc, 1 inc) x5, 9 sc [120]
Do not fasten off and do not remove the stitch marker. We need it for the next step.
Attach ears to the pillow body
Start by marking the ear positions with stitch markers. Take the front side of the pillow body and locate the stitch marker indicating the start of Round 20. From there, count 12 stitches and place a new stitch marker in the 12th stitch — this marks the position for the first ear.
Then, count 24 stitches from that point and place another stitch marker. Count another 12 stitches and mark the 12th one — this will be the position for the second ear.
Position the ear right side up, with the back of the ear facing you, on the pillow body (the nice side of the body should also be facing you). It doesn’t matter which of the two circles you use.
Now crochet around with 120 single crochet (sc) to form Round 21 of the front pillow body.
When you reach the ears, insert your hook first through an ear stitch, then through a body stitch. For all other stitches, crochet as usual with regular single crochets.
Close pillow body
Place both circles with the right sides facing each other, making sure the circle with the attached yarn is on top.
Using slip stitches (sl st), crochet the opposite stitches of both circles together to create a neat, tight seam. Stop once you reach the second ear. Cut the yarn, leaving a long enough tail to sew the remaining stitches closed.
Gently turn the piece right side out through the opening. Stuff the pillow firmly, then use a needle to sew the opening closed. Cut the yarn and weave in the end.
Eyes
Black eye Patches
Make 2x. Do not stuff the black circle.
Black color
R1: 6 sc in mr [6]
R2: (1 inc, 1 sc) x2 [8]
R3: (3 sc in 1 stitch x2, 2 sc) x2 [16]
R4: 2 sc, 2 inc, 6 sc, 2 inc, 4 sc [20]
R5: 3 sc, 2 inc, 8 sc, 2 inc, 5 sc [24]
Fasten off: Crochet 1 additional sl st. Cut the yarn with enough left over for sewing later to the pillow body.
Eyes
Make 2x.
Black color
R1: 6 sc in mr [6]
Fasten off: Crochet 1 additional sl st. Cut the yarn with enough left over for sewing later.
Make 2.
White color
R1: 6 sc in mr[6]
R2: 6 inc [12]
Fasten off: Crochet 1 additional sl st. Cut the yarn with enough left over for sewing later.
Applying eyes to the pillow body
Place the smaller black eye circle on top of the larger white one.
Sew the two pieces together, then repeat for the second eye.
Next, position the finished eye on top of the black eye ring as shown in the picture.
Using white yarn, sew the eye onto the black ring. Repeat for the second eye.
Now place the completed eye section on the pillow body and secure it with long pins. Refer to the picture for exact placement — the inner edge should sit between Rounds 5 and 6.
Sew the eye section in place, then repeat with the second eye.

Nose
Black color
Embroider the chunky nose onto the pillow, positioning the top of the nose so it ends at the magic ring of the front pillow body.
Finished!